The best practices for preparing your cabinets for painting
Learn essential steps to prepare your cabinets for painting, ensuring a flawless finish in Jacksonville homes.
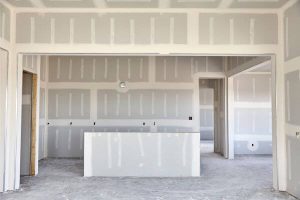
Preparing your cabinets for painting is a crucial step to achieving a professional and long-lasting finish. In Jacksonville, homeowners are discovering the importance of thorough preparation to enhance their cabinet transformations. Let?s explore the best practices that ensure your painting project starts on the right foot and ends with stunning results.
Remove and label hardware
Start by removing all cabinet doors, drawers, and hardware. Label each piece to make reassembly easier. This step prevents paint from getting on hinges and handles, ensuring a clean finish. By keeping everything organized, you save time and avoid confusion when putting your kitchen back together.
Organize small parts
Use small bags or containers to hold screws and hinges. Label these clearly to maintain organization. This practice ensures you don’t misplace important components during the painting process, streamlining the reassembly phase.

Clean the surfaces thoroughly
Cleaning is essential for paint adhesion. Use a degreaser to remove oils, grime, and dust from all cabinet surfaces. Pay special attention to areas around handles and corners where dirt accumulates. A clean surface allows the paint to adhere properly, preventing peeling or chipping down the line.
Rinse and dry
After cleaning, rinse the cabinets with water to remove any residue. Dry them thoroughly with a clean cloth. Ensuring that the surfaces are completely dry is crucial for the primer and paint to adhere effectively, setting the stage for a smooth finish.
Sand for a smooth surface
Sanding is key to a flawless finish. Lightly sand all surfaces to remove gloss and create a texture for the primer to grip. Use fine-grit sandpaper for this task. This step helps the paint adhere better and results in a more even and professional appearance.
Dust removal
After sanding, use a tack cloth to wipe away dust particles. This ensures that the surface is free of debris, which can affect the final look of the paint. Taking the time to eliminate dust is crucial for achieving a pristine finish.
Apply a high-quality primer
Priming creates a solid base for paint, enhancing durability and color vibrancy. Choose a primer suitable for your cabinet material. Apply it evenly across all surfaces and allow it to dry fully. A quality primer not only improves paint adhesion but also helps conceal any imperfections or previous colors.
Consider multiple coats
If needed, apply a second coat of primer for better coverage. This is particularly important when transitioning from dark to light colors. Ensuring adequate primer coverage provides a uniform base, contributing to the overall success of your painting project.
- Ventilation: Work in a well-ventilated area to avoid fumes.
- Protect surfaces: Use drop cloths to safeguard floors and countertops.
- Safety gear: Wear masks and goggles for protection.
- Patch imperfections: Use filler for dents or cracks.
- Test colors: Try samples on a small area before full application.
In conclusion, preparing your cabinets for painting is a meticulous process that pays off with beautiful results. By following these best practices, Jacksonville homeowners can achieve a flawless finish that revitalizes their kitchens. Embrace the preparation phase and enjoy the transformation of your space.